This is an old revision of the document!
Table of Contents
Create a Visual C++ Linux Project In Visual Studio
The Visual Studio Linux Features do not inherently support cross-compiling on a Windows PC. Instead, Visual Studio will upload the the source files to the ComfilePi, and use the ComfilePi's toolchain to build the executable. The executable is then executed on the ComfilePi, and the Visual Studio Remote GDB Debugger attaches to it.
This method can be used for much more than console applications, including Qt, GTK+, and even OpenGL to name a few. The demonstration that follows illustrates that development process for very simple GTK+ GUI application.
Download the source code for this demonstration.
Create a New Project in Visual Studio
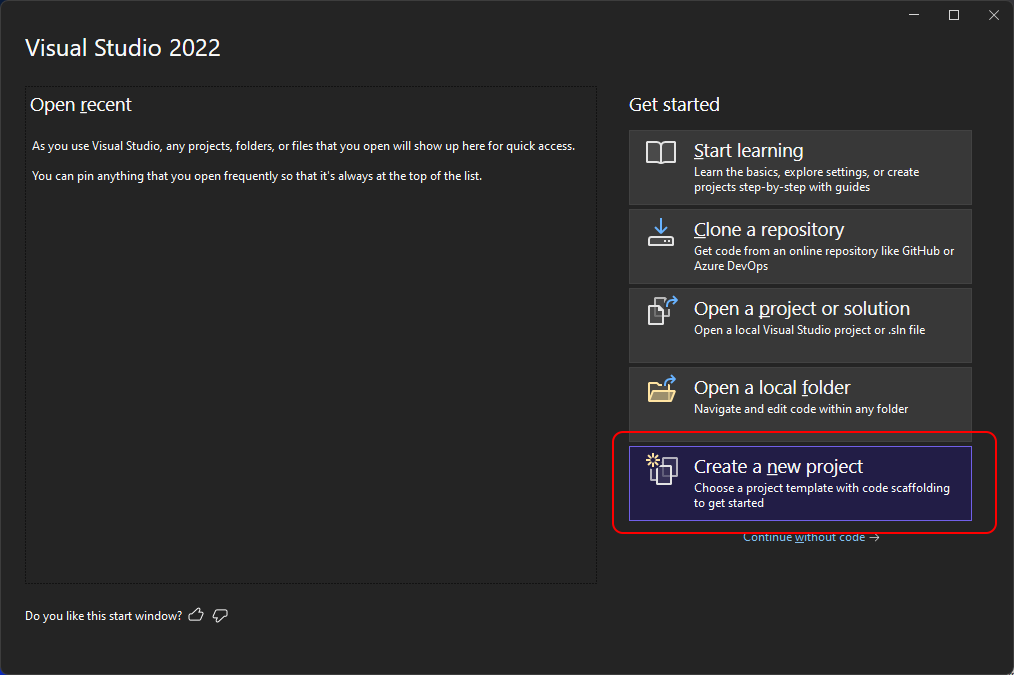
- Open Visual Studio to create a new project.
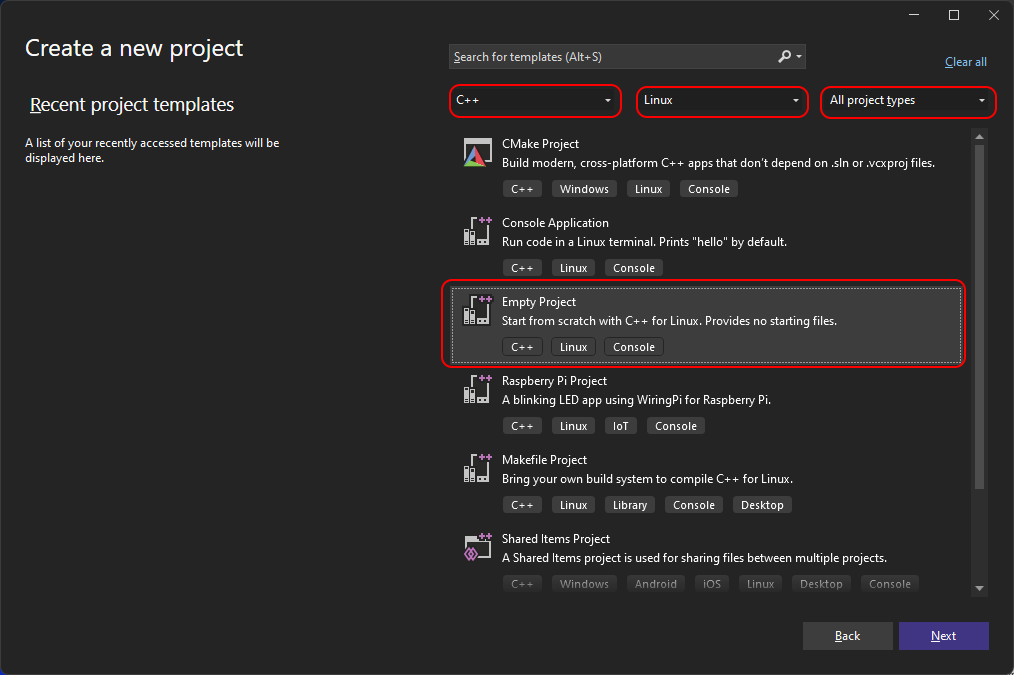
- Use the Empty Project template, but others are also possible.
- Change the platform to ARM or ARM64 per the ComfilePi OS variant that you are using.

- Use the Connection Manager to establish an SSH connection with the target ComfilePi panel PC.

- Add a new main.cpp source file with the following code.


#include <gtk/gtk.h>

static void print_hello(GtkWidget* widget, gpointer data)
{
    g_print("Hello World\n");
}

static void activate(GtkApplication* app, gpointer user_data)
{
    GtkWidget* window;
    GtkWidget* button;
    GtkWidget* button_box;

    window = gtk_application_window_new(app);
    gtk_window_set_title(GTK_WINDOW(window), "Window");
    gtk_window_set_default_size(GTK_WINDOW(window), 200, 200);

    button_box = gtk_button_box_new(GTK_ORIENTATION_HORIZONTAL);
    gtk_container_add(GTK_CONTAINER(window), button_box);

    button = gtk_button_new_with_label("Hello World");
    g_signal_connect(button, "clicked", G_CALLBACK(print_hello), NULL);
    g_signal_connect_swapped(button, "clicked", G_CALLBACK(gtk_widget_destroy), window);
    gtk_container_add(GTK_CONTAINER(button_box), button);

    gtk_widget_show_all(window);
}

int main(int argc, char** argv)
{
    GtkApplication* app;
    int status;

    app = gtk_application_new("org.gtk.example", G_APPLICATION_FLAGS_NONE);
    g_signal_connect(app, "activate", G_CALLBACK(activate), NULL);
    status = g_application_run(G_APPLICATION(app), argc, argv);
    g_object_unref(app);

    return status;
}
There will be many Intellisense errors because we haven't yet updated the include paths for GTK.
Specify the Include Paths in the Project's Properties
Open the Project's Properties window.
- Modify the C/C++–>General–>Additional Include Directories with the following:
/usr/include/gtk-3.0;/usr/include/at-spi2-atk/2.0;/usr/include/at-spi-2.0;/usr/include/dbus-1.0;/usr/lib/aarch64-linux-gnu/dbus-1.0/include;/usr/include/gtk-3.0;/usr/include/gio-unix-2.0;/usr/include/cairo;/usr/include/pango-1.0;/usr/include/fribidi;/usr/include/harfbuzz; /usr/include/atk-1.0;/usr/include/cairo;/usr/include/pixman-1;/usr/include/uuid;/usr/include/freetype2;/usr/include/libpng16;/usr/include/gdk-pixbuf-2.0;/usr/include/libmount;/usr/include/blkid;/usr/include/glib-2.0;/usr/lib/aarch64-linux-gnu/glib-2.0/include
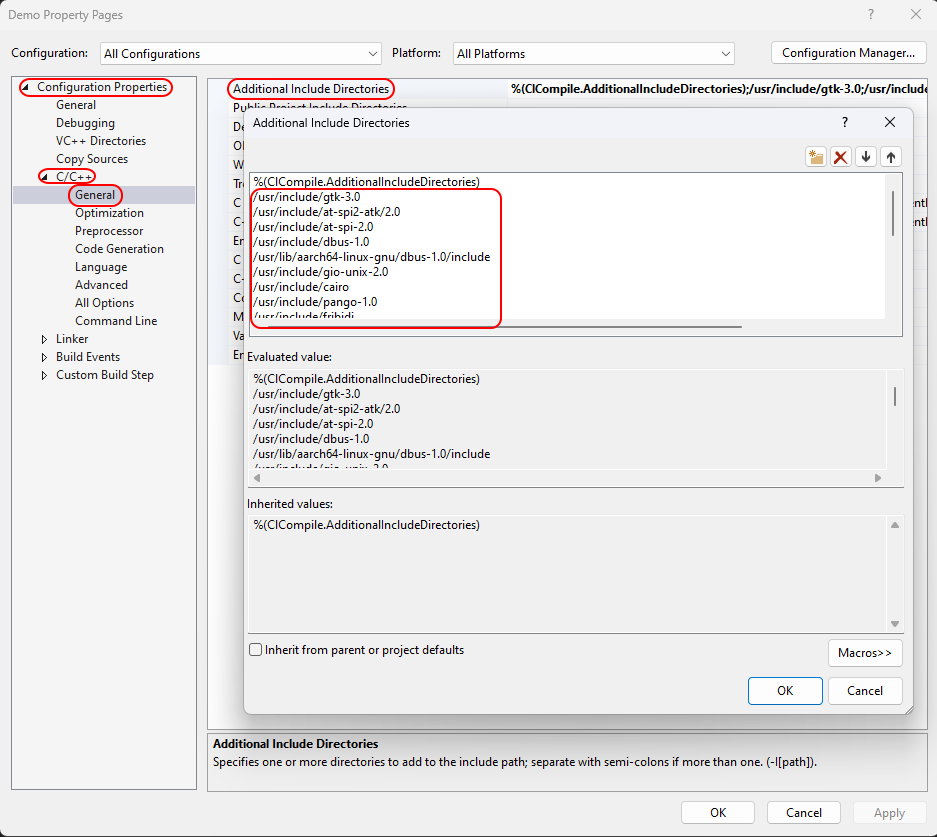
These includes can be determined by runningpkg-config --cflags gtk+-3.0on the ComfilePi.
After adding the additional includes paths, there should no longer be any Intellisense errors.

Specify the Library Depenencies in the Project's Properties
- The prior step will solve the Intellisense errors, but there will still be linker errors when the project is compiled. To resolve those errors, add the following library dependencies.
gtk-3;pangocairo-1.0;pango-1.0;harfbuzz;atk-1.0;cairo-gobject;cairo;gdk_pixbuf-2.0;gio-2.0;gobject-2.0;glib-2.0

Those library dependencies can be obtained by running pkg-config --libs gtk+-3.0 on the ComfilePi.
Deploy, Build, and Degug
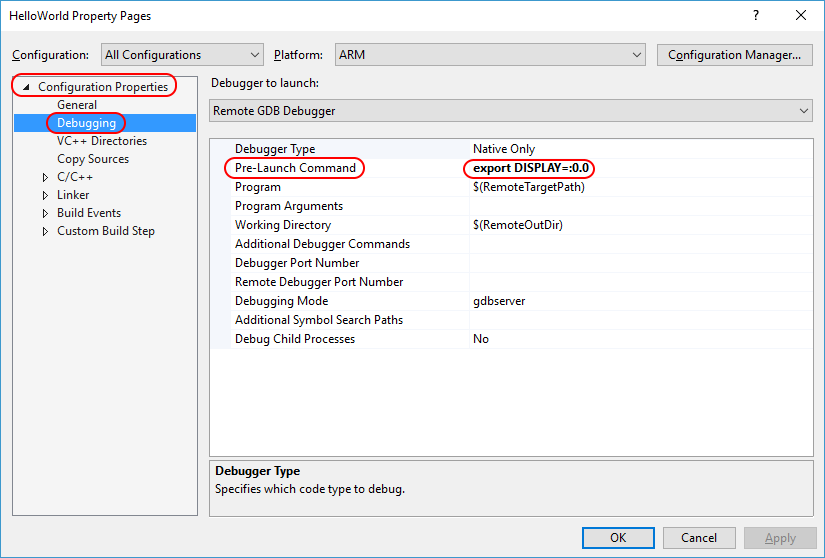
- Add
export DISPLAY=:0.0to the Configuration Properties–>Debugging–>Pre-Launch Command setting so the ComfilePi knows which display to show the window on.
- Start the Remote GDB Debugger. The source code will be uploaded to the ComfilePi to be built.

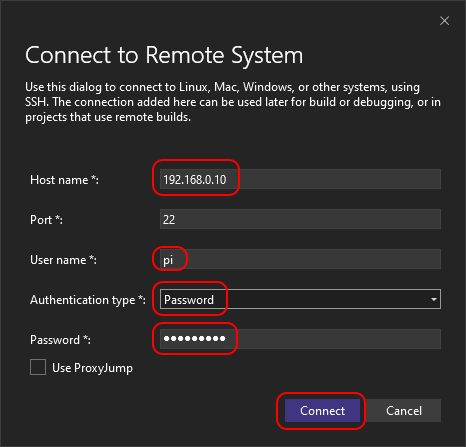
The first time, a Connect to Remote System dialog window may appear. Enter the IP address of the ComfilePi in the Host name field and enter the ComfilePi's user credentials.

The settings can be changed in the Configuration Properties–>General–>Remote Build Machine setting.

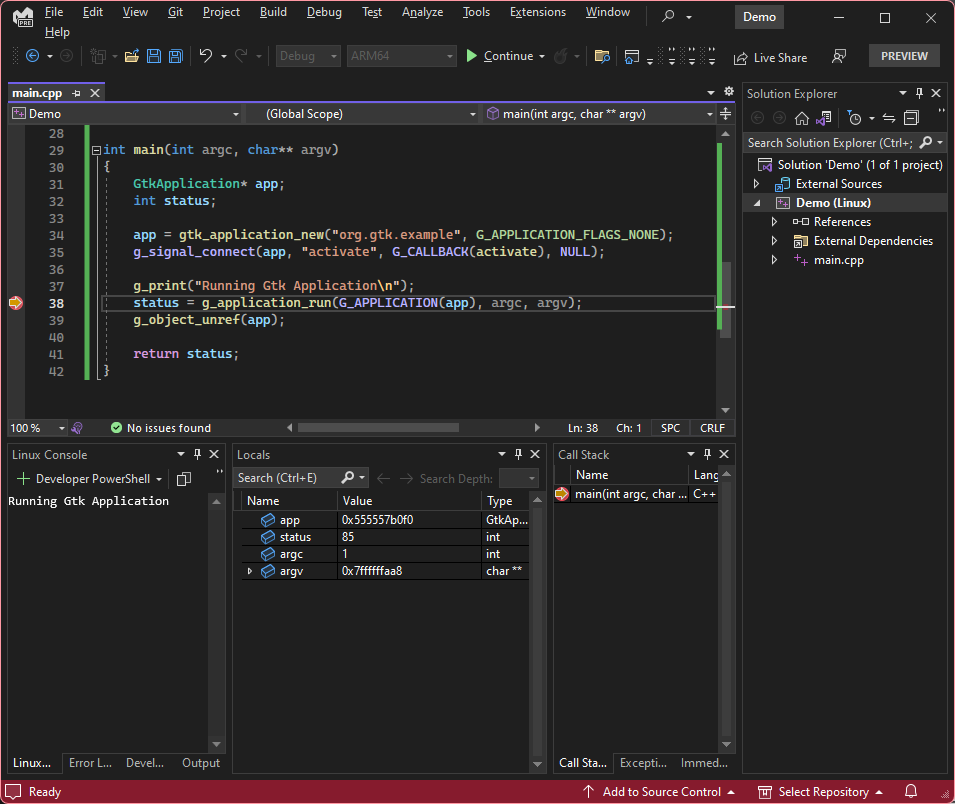
- If no build errors are encountered, the program will execute on the ComfilePi, and the Visual Studio Remote GDB Debugger will attach to it. Go to Debug–>Linux Console to display the Linux Console Window and view any messages from
printfstatements.